
## 🗃️文件架构
apps -- 业务核心
config -- 配置文件
img -- readme图片
model -- 核心文件[建议不动]
resource -- 资源文件
test -- 爬虫文件[python]
utils -- 工具类
index -- 主入口
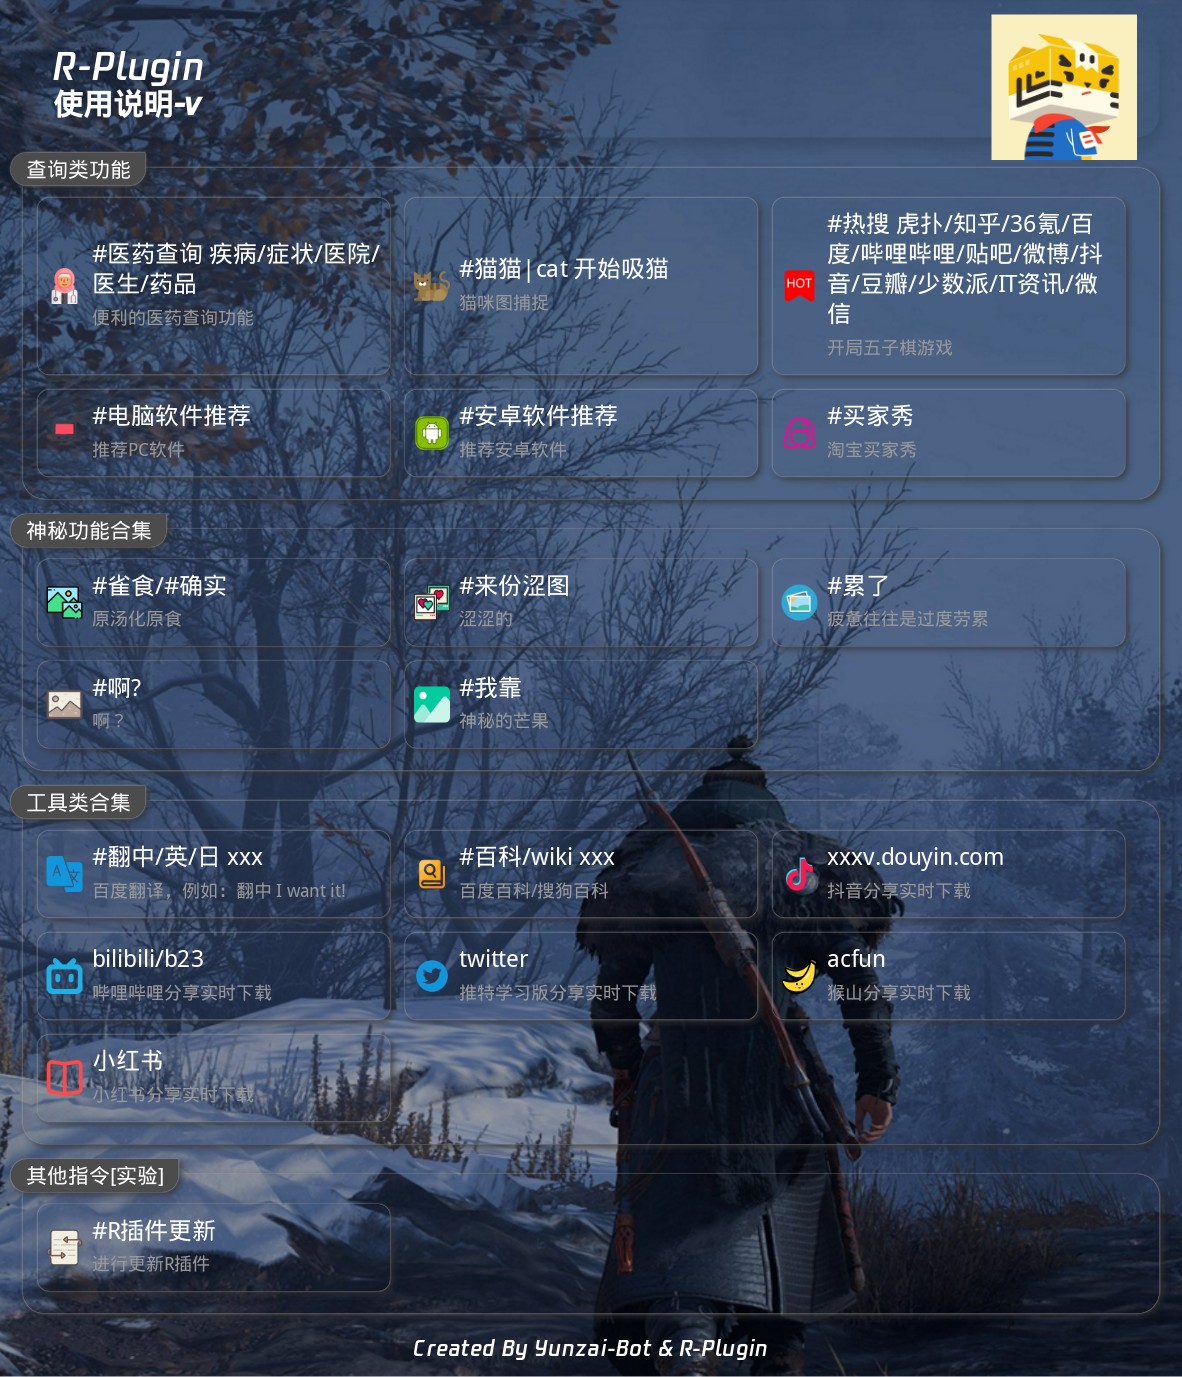
## 🧏♂️使用实例


## 🤺BUG及时交流群
【关于Windows适配】目前 [好冷群友](https://gitee.com/hetangx) 已经提供了一个比较可靠的解决方案,已经采纳并使用!

## 📔使用说明
1.【必要】在`Yunzai-Bot`安装mongodb、axios(0.27.2)、代理工具(tunnel)、TwitterAPI依赖
> pnpm add mongodb axios tunnel twitter-api-v2 -w
2.【必要】下载插件
> git clone https://gitee.com/kyrzy0416/rconsole-plugin.git ./plugins/rconsole-plugin/
3.【可选】要使用`视频解析`功能要下载插件【推荐ubuntu系统】
```shell
# ubuntu
sudo apt-get install ffmpeg
# centos 参考:https://blog.csdn.net/XIAOGUANG_/article/details/105343886
# Windows 参考:https://www.jianshu.com/p/5015a477de3c
````
## 🧑🌾进阶
【可选】备注:考虑到不是所有电脑都有mongodb,如果要开启`#我靠`功能,需要进行以下操作:
### 使用Python、Mongodb爬虫三次元图片
首先去test文件跑python代码(要安装`requirements.txt`要求的依赖)
> python3 ./test/main.py
需要把以下代码(apps/mystery.js)注释取消:
```javascript
// in apps/mystery.js
// Mongodb初始化
import mongodb from 'mongodb'
// Mongodb初始化
function initMongo () {
const MongoClient = mongodb.MongoClient
const url = 'mongodb://localhost:27017/'
return new Promise((resolve, reject) => {
MongoClient.connect(url, (err, db) => {
const dbo = db.db('test')
if (err) {
throw err // 和调用 reject(err) 效果类似
}
let collection = dbo.collection('temp')
resolve(collection)
})
})
}
const mongo = initMongo()
// ...
{
reg: '^#我靠', fnc: 'tuiimg'
}
// ...
async tuiimg (e) {
const MAX_SIZE = this.mysteryConfig.tuiimg.count
this.reply('这群早晚被你整没了...')
let images = []
const template = {
nickname: this.e.sender.card || this.e.user_id, user_id: this.e.user_id
}
await mongo.then(conn => {
return conn.aggregate([ { $sample: { size: MAX_SIZE } } ]).toArray()
}).then((result) => {
result.forEach((item) => {
images.push({
message: segment.image(item.url), ...template
})
})
})
return !!(await this.reply(await Bot.makeForwardMsg(images), false, {
recallMsg: recallTime
}))
}
```
> 备注:
> 1. linux/windows系统下自己装一个mongodb,上一个密码(不上有风险)
> 2. `test/main.py`爬取链接(要有python环境、配合mongodb使用)
### 其他进阶操作
【可选】相关配置(apps/tools.js):
> twiiter-api:https://developer.twitter.com/en
注册完之后将`Bearer Token`填入app/tools.js twitter方法的TwitterApi后面的单引号里`const twitterClient = new TwitterApi('', {httpAgent});`
> 百度翻译api:https://fanyi-api.baidu.com/doc/21
注册完填入方式参考上方注释url (app/tools.js)
> 更改proxy地址在tools的71行:
`this.proxyAddr = '10.0.8.10';`
## 📦业务
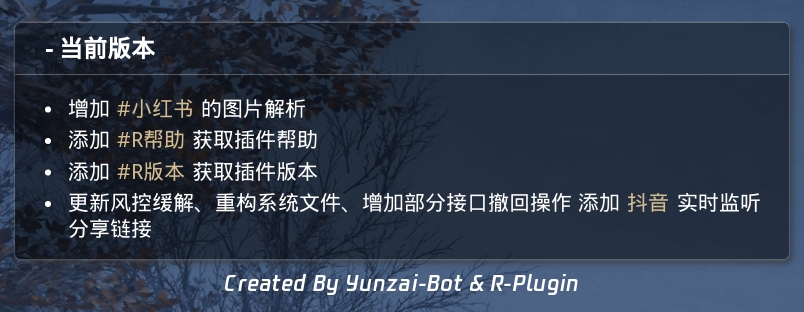
## 🤳版本
## 开发团队
| Nickname | Contribution |
| :----------------------------------------------------------: |--------------|
|[易曦翰](https://gitee.com/yixihan) | 后端开发 |
|[zhiyu](https://gitee.com/kyrzy0416) | 后端开发 |
|[Diviner](https://gitee.com/divinerJJ) | 前端开发 |
|[小白白](https://gitee.com/little_White01) | 后端开发 |
## 🚀后记
* 文件借鉴了很多插件,精简个人认为可以精简的内容。
* 素材来源于网络,仅供交流学习使用
* 严禁用于任何商业用途和非法行为
* 如果对你有帮助辛苦给个star,这是对我最大的鼓励